Wednesday, November 1, 2017

Noriko Endo Confetti Quilt

I'm able to take a class with Noriko Endo, a Japanese quilter known for confetti quilts and thread painting (She was just in the US as one of the instructors for the Fall Paducah QuiltWeek).  This is one of the few times I've made an "art" quilt.  Some parts of the process are much easier than a contemporary (or traditional) quilt, but it's still not my favorite style.  I admire other people's work, especially quilts that look incredibly realistic, but it's not a type of quilt I'll make often in the future.  (Much to my husband's dismay - he said this is his favorite of the quilts I've made.)

Here's the photograph I used to design my quilt.

The first step is to find a photograph you like.  I wasn't given a lot of guidelines for this, so I wasn't sure what would work.  I end up choosing a picture I took soon after moving to Tokyo, of a ginkgo tree's leaves, right as they start to turn to gold.  

The "finished" top, with a layer of tulle to hold it (mostly) in place.
  There was some shifting as I carried it home.
Then I cut out some pieces of black fabric to represent the tree trunk and branches.  It's all free hand, with no drawn lines.  It's kind of fun to not worry about having to line up rulers and marks!  

To cut the fabric confetti, you need to have a sharp rotary cutter.  Some people sliced their material so the pieces are square, but I like the rectangle shapes better.  I think your eye doesn't flow over the square shapes as well as the rectangular ones (sorry, I don't have a picture so show the difference).  

After you have a collection of fabric chopped up, you can cut your batting and backing to the size you want for the finished quilt.  The batting ends up forming the background for the quilt top.  It helps to grip the little bits of fabric, though if you want a specific color, you can put a piece of fabric on top of the batting.  Once I place the tree pieces down, I can scatter the confetti leaves all over the quilt top.  That's it!  The top has now been "pieced."

black tulle
To hold the fabric in place, you lay a piece of black tulle over the top (sometimes two layers of tulle for a big project), and quilt it with something simple, like stippling, to stitch the little pieces in place.  I use smoke MonoPoly (from Superior), so it's not really noticeable. 

Then you can add some more detail with the quilting.  I choose to stitch some ginkgo leaves on the tree.  After doing some research online to look at the leaf shapes (it's March, so there's no leaves on the trees) and practicing - first by sketching, then on a practice quilting piece - I'm ready to add them to my quilt.  (Side note - the BEST pictures to use for quilting ideas are tattoo designs.  You can usually find ones that look like a simple sketch.  Very helpful to transpose for quilting!)

Can you find the ginkgo leaves?
For the first time, I use Golden Threads Quilting Paper to mark the quilting lines.  It works very well for this project!  On the paper I'm able to easily mark the placement of the tree (by putting it on my quilt and tracing the edge of the black fabric), and I can then draw the ginkgo leaves so they go exactly where I want them.  I pin the paper to my quilt, then trace the leaves with a fluorescent green thread (Fujix brand).  I eagerly tear off the paper...but I can barely see the ginkgo leaves. 


There they are!
I ask Noriko-san what she recommends, and she suggests going over the lines a second time.  I do that, with some bright lights, so I can see the (not so fluorescent) green lines.  It works though, and now the ginkgo leaves can be viewed!

Ginkgo leaves growing off the tree branches...


I think this one works for the piping!
Okay, my favorite part of the entire art quilt process is cutting down the quilt.  I can literally pick whatever size I want - and I don't have to worry about chopping off points, uneven borders, etc, etc - I just have to cut in a straight line.  This is fun!  I end up making it about 19" square.  Next I think I might want to add a border so it's like a picture frame, but then I remember I already have the center quilted with a back and batting.  Yes, I could add fabric to the top along with the other layers, but that's really more work than I want to do.  So I decide instead of just binding it, I'll add a piped border.  I have a little kit describing what to do, and since I dragged it along with me to Japan, I want to use it.  This turns out to be the perfect project for it, because it's small, so I don't have to make miles of piping.  

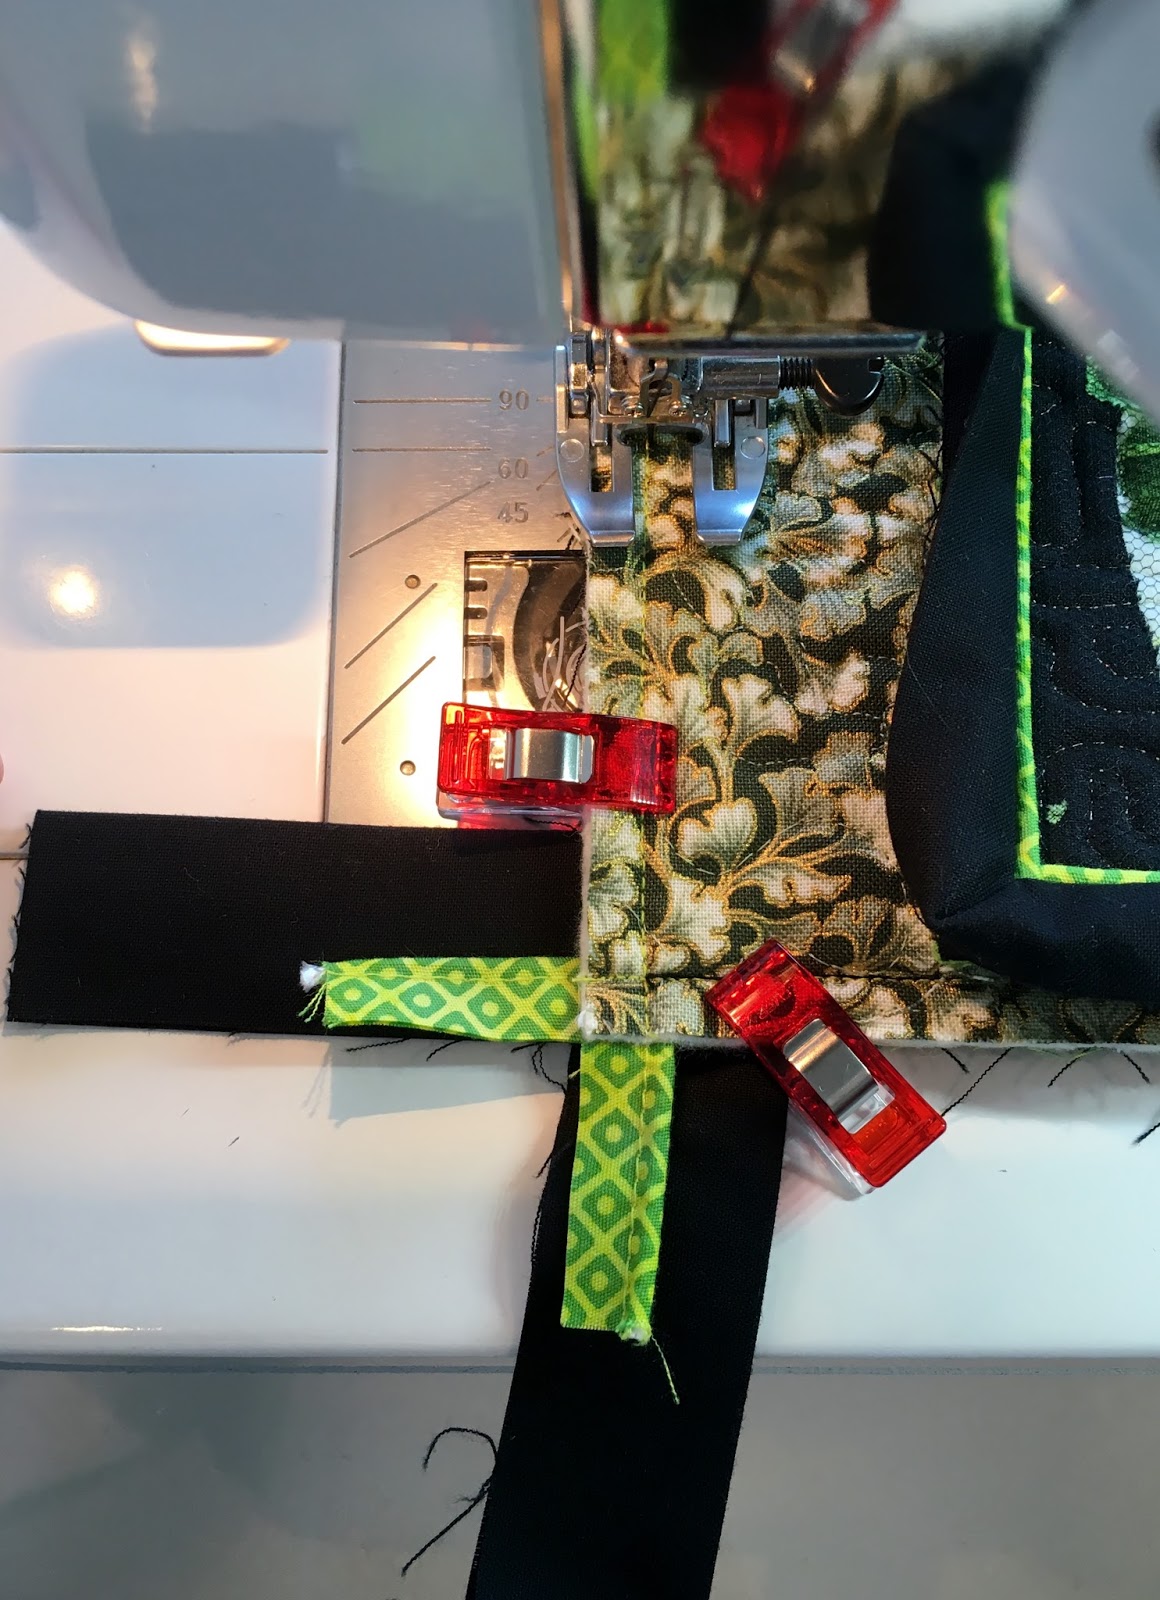
adding the binding and piped cording


I test out different fabrics, and decide I like the diamond patterned lime green.  It's a pretty easy process to make the piping, and it's not difficult to add to the quilt. (Though when the directions tell you to baste it on with a contrasting thread, actually use a contrasting thread so you can easily see it.  It ends up being your guide for sewing on the binding, so you want it to be visible - and it's hidden inside the binding, so it won't show.)  My Clover Wonder clips, which I haven't used often, come in handy in this situation!


Here's the finished quilt!  Since the tree leaves are changing, the picture was taken right after I arrived in Tokyo and it's a different quilt style for me, I think "Changes" is an appropriate name for it.

Changes

You can't see much of the quilting on the back because of the ginkgo leaf print.  However, it was too perfect not to use - I had already purchased the fabric at Tomato, before I even started working on this project.

Ginkgo leaves on the back, too!

So this is a total coincidence - I took the class with Noriko Endo in March of 2016.  I had the top finished that day, but it took me awhile longer to finish the quilting and binding (graduation quilts took priority).  Later that year I get the information about my guild's quilt challenge for our show in 2017...and it's to make a quilt based on a photograph.  I had nothing to do with it!  But I'm happy to say I have it finished, and ready to enter in the show.

No comments:

Post a Comment